These are series of windows communication foundation articles, in which I will show you how I learn from making a simple wcf service & then host it at iis, windows services, was & use different sort of bindings etc.
I have written a simple WCF Service Library and named it EmployeeServiceLibrary
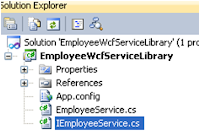
I have renamed the Interface & implanted class as shown above. First I made the IEmployeeService & defined OperationContract, DataContract & DataMember.
Now for the newbie, a question will come into the mind what are these hacks, so let me give a brief overview of these terminologies:
http://msdn.microsoft.com/en-us/library/ms735119%28VS.90%29.aspx
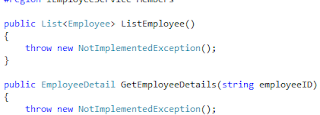
Then I have to remove the code available with in EmployeeService.cs by default & to implement IEmployeeService.cs I will do as follows:
It will give me following screen:
I have to add following variables:

As I need to get data from AdventureWorks DB, do definitely I need my application to talk to SQL Server, so I follow it like this:
I choose properties of EmployeeWCFServiceLibraryProject & then choose settings. As there is no setting file is there so I have choose to create one option.
I gave it name AdventrueWorksConnectionString & choose type as connection string. From the value section, I choose my DB.
Now it is time to do a little bit of coding. I have to implement the ListEmployee method of IEmployeeService Interface to fetch data from Employee table of AdventureWorks DB.
Moreover I have to add System.Data & System.Data.SqlClient namespace to talk to DB. Following code snipets I used to fetch data for employee:
public ListEmployee> ListEmployee()
{
employees = new ListEmployee>();
using (var cnn = new SqlConnection(
Properties.Settings.Default.AdventureWorksConnectionString))
{
using (var cmd = new SqlCommand(
"Select EmployeeID, Title " +
"From Employee Order by EmployeeID", cnn))
{
cnn.Open();
using (SqlDataReader EmployeeReader =
cmd.ExecuteReader())
{
while (EmployeeReader.Read())
{
employee = new Employee();
employee.EmployeeID=
EmployeeReader.GetString(0);
employee.EmployeeTitle =
EmployeeReader.GetString(1);
employees.Add(employee);
}
}
}
}
return employees;
}
Then I use following code to fetch contact details for each employee:
public EmployeeDetail GetEmployeeDetails(string contactID)
{
employeeDetail = new EmployeeDetail();
using (var cnn = new SqlConnection(
Properties.Settings.Default.AdventureWorksConnectionString))
{
using (var cmd = new SqlCommand(
"select ContactID, FirstName, " +
"LastName, EmailAddress from Person.Contact " +
"where ContactID= @contactID order by ContactID", cnn))
{
cmd.Parameters.Add(new SqlParameter("@contactID", contactID));
cnn.Open();
using (SqlDataReader ContactReader =
cmd.ExecuteReader())
{
while (ContactReader.Read())
{
employeeDetail.ContactID =
ContactReader.GetString(0);
employeeDetail.EmployeeFirstName =
ContactReader.GetString(1);
employeeDetail.EmployeeLastName =
ContactReader.GetString(2);
employeeDetail.EmployeeEmail =
ContactReader.GetString(3);
}
}
}
}
return employeeDetail;
}
Then finally I implement the SaveChanges method as follows:
public bool SaveChanges(string contactID, string employeeFirstName, string employeeLastName,
string employeeEmail)
{
using (var cnn = new SqlConnection(
Properties.Settings.Default.AdventureWorksConnectionString))
{
using (var cmd = new SqlCommand(
"update Person.Contact " +
"set FirstName= @FirstName, " +
"LastName= @LastName, " +
"EmailAddress= @EmailAddress " +
"where ConatctID= @conatctID", cnn))
{
cmd.Parameters.Add(new SqlParameter(
"@FirstName", employeeFirstName));
cmd.Parameters.Add(new SqlParameter(
"@LastName", employeeLastName));
cmd.Parameters.Add(new SqlParameter(
"@EmailAddress", employeeEmail));
cmd.Parameters.Add(new SqlParameter(
"@conatctID", contactID));
cnn.Open();
numRowsChanged = (int)cmd.ExecuteNonQuery();
}
}
return (numRowsChanged != 0);
}
Now all set to go, its time to test our WCF Service, If I run the application, wcf service host will host our service & show us wcf test client where we can test our service. If I click ListEmployee() function & then click invoke, I will get a formatted list of employee table.
 Now our WCF Service is ready to be used & can be hosted in IIS, Windows service or WAS.


